Zur Deutschsprachigen Version des Blogposts hier clicken!
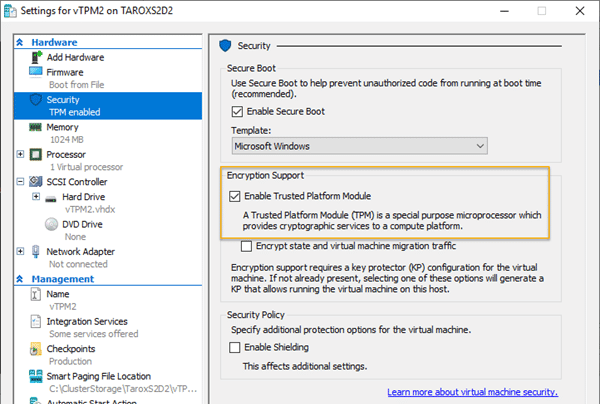
Since we have two Azure Stack HCI clusters with TPM version 2 chip, I thought it would be a good idea to encrypt our domain controllers with Bitlocker. Under Hyper-V, it is straightforward to equip a VM with a vTPM chip. To do this, you only have to check the checkbox „Enable Trusted Platform Module“ in the settings of a Generation 2 VM (see screenshot).
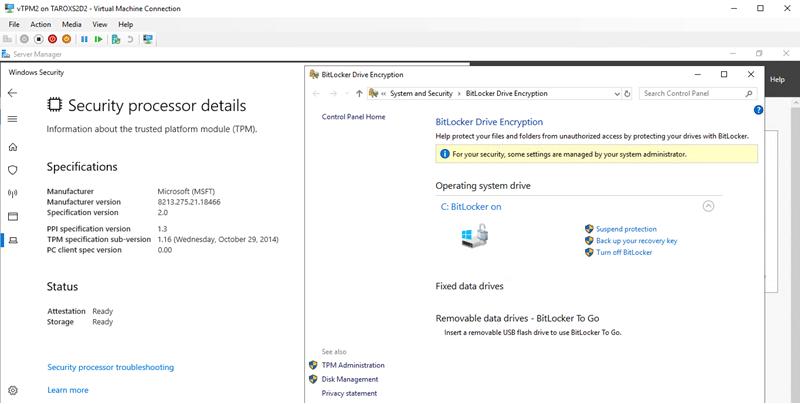
If the TPM chip is available in the VM, you can now use it for BitLocker. The screenshot shows the TPM information on the left and the BitLocker status on the right.
So far, so good. However, there is a problem if you want to move the VM from one cluster node to another node via live migration. Here the live migration fails with the following error message:
Virtual machine migration operation for ‚vTPM2‘ failed at migration destination ‚TAROXS2D4‘. (Virtual machine ID 85D7A0BC-9979-4B64-A817-609B14278C67)The version of the device ‚Microsoft Virtual TPM Device‘ of the virtual machine ‚vTPM2‘ is not compatible with device on physical computer ‚TAROXS2D4‘. (Virtual machine ID 85D7A0BC-9979-4B64-A817-609B14278C67)The key protector for the virtual machine “ could not be unwrapped. HostGuardianService returned: One or more arguments are invalid (0x80070057) . Details are included in the HostGuardianService-Client event log. (Virtual machine ID )
In the error text, the „HostGuardianService“ is mentioned. Does this mean that we absolutely need it? Fortunately, the answer is no. Don’t get me wrong. Of course, for a secure environment, it is advisable to build the Hostguardian Service or better a cluster of Hostguardian Services, but it is also possible without it.However, we need two certificates per host that are imported on all live migration targets. How do we get these certificates? This is relatively simple.When a VM is created with a vTPM or a vTPM is activated on an existing VM, Hyper-V creates a „directory“ in the local „Certificate Store“ called „Shielded VM Local Certificates“. The two required certificates, each of which is valid for 10 years, are then created in this directory. They are called:
- „Shielded VM Encryption Certificate (UntrustedGuardian) (<Hostname>)“
- „Schielded VM Signing Certificate (UntrustedGuardian) (<Hostname>„
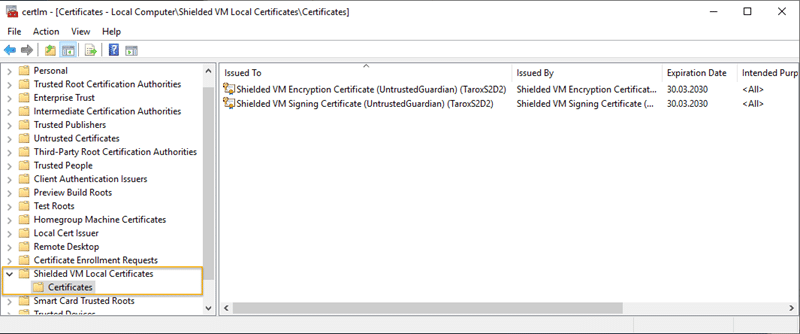
These certificates must be exported, including the private key, and then imported on each host where you want to move the VM. In a Cluster like a Storage Spaces Direct Cluster this is obviously every node.Since the certificates are only generated when a VM with vTPM is created, the procedure is as follows:
- 1Create a VM with a TPM on each host or activate the TPM for a VM
- 2Export certificates from any host including the private key
- 3Import missing certificates on each host
After this is done, the „Certificate Store“ on each system should look like the screenshot.
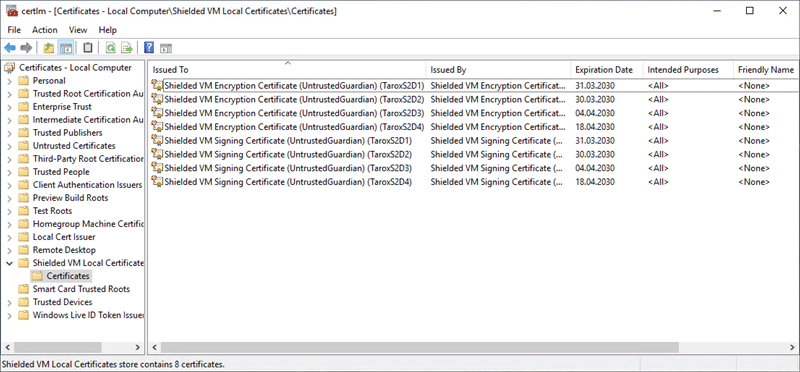
Now you can move the VM to any node in the Hyper-V cluster.
I have created a video about this topic in which everything is explained again.
Have fun watching.

